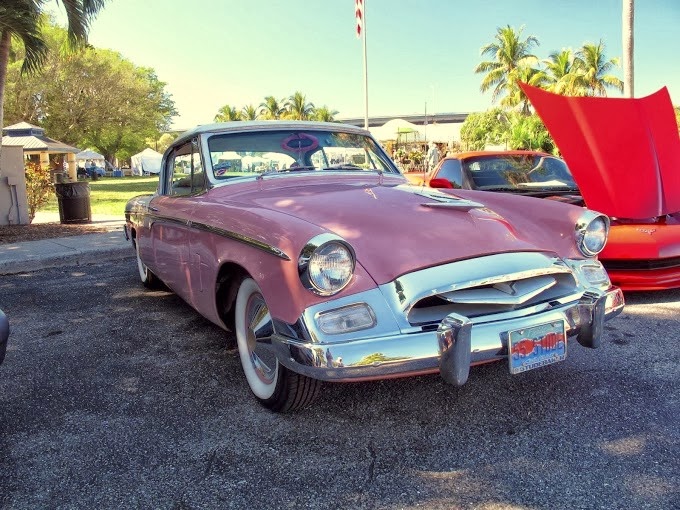
As you may know, for winter break I went to Florida. I actually left it exactly one week ago (from when this post is up). It was pretty awesome, the weather was amazing. Here are some pictures from the trip, taken by my dad so credits to him. Follow him on instagram (@agatol) if you want. They are in no particular order. You can also expect an ootd from one of the cooler days sometime next week.
Feb 28, 2014
Feb 24, 2014
Trend Focus: The Slip-on Sneaker
Slip-on sneakers are probably one of the most fashionable shoes right now, they taking the place of the wedge sneakers. Before 2013 only Vans made shoes like this, which were favorised by skaters and surfers. After, I believe, Celine brought out their pony hair version a lot of slip-ons in different fabrics, patterns and prices started appearing on the market. Now you can buy them almost everywhere - from Givenchy to Michael Kors to H&M. Lots of bloggers and fashion week attendees have been seen wearing them. No wonder: not only are these shoes comfortable, but also chic and can be dressed up or down.
I liked them for a few months now, but what really made me want them is my friend getting the H&M version with leopard. They looked really good on her and as I found a burgundy pair at the Steve Madden Outlet in Orlando for just 10$ I just had to get them. And I'm so happy I did! I already wore them once and they are perfection. I can't wait to style them with many different outfits!
Here are some ideas how you could style your slip-ons:
Leopard is a pretty "strong" (?) print so I would keep the rest of the outfit simple. All-black always looks fabulous! Add some gold jewellry and sunglasses for a more laid-back look.
This is a more girly way to wear slip-ons. These floral ones from Givenchy are just to die for. This look I wouldn't wear on a daily basis, especially the flower crown, but I think it's perfect for a festival or even a summer party. Just imagine how great this would look with wavy hair and natural make up!
This outfit is more casual - perfect for school or just going grocery shopping. The plaid pattern and the leather backpack make a simple combination like light-wash boyfriend jeans and cream sweter edgy and original.
I wouldn't necessarily wear these shoes in snow or rain, but as long as it's dry and over, let's say, 10°C you can style them just fine. I chose this big gray coar, which makes you look a little bit more sophisticated.
This look is kind of more dressy, but not really... haha.. I mean, you could wear this to a party, or you could take a bigger bag and a lighter lipstick or wear it shopping/getting lunch or if don't wear the lipstick and a simpler skirt this could even work for work (if you don't have a strict dress code). It's all about exchangig items for 'simpler' ones or just leaving them out. :)
Check out the items in the sets here: Slip-On Sneakers Polyvore Collection
That would be it for today's post. It took me hours to make this (I get distracted easily..) but I'm happy with it. I can't wait to wear my slip-ons on I will try to feature them in a post. Stay tuned!
Feb 5, 2014
Update
Let's just get straight into it, I weren't on for a while and I didn't even finish my blogmas. I feel kind of ashamed because of that, I thought I could make it. I actually really wanted to do it, but I was really tired after Uni everday and I just wasn't in the mood for posting something and altough I kind of promised I'd do it, I didn't want to do something that wouldn't make me happy. And that's what bloggigng is for - for fun.
Anyway, I'm going to Florida on Saturday, so there's going to be tons of pictures and I'll try to take some ootd photos to post on here. I know I always say "I'll try" and then I don't do it, but I mean it this time. I'm going to have tons of photos anyway.
Also, I'm thiking about starting a youtube channel, but now all I have to film with is my phone, so I have to think about it.
That would be everything, expect some more summer-y pictures soon!
Dec 18, 2013
Snowflake MakeUp Look
First of all, sorry for not pposting yesterday, but I had some issues with my friends's and my new year's eve plans. Today I am going to show you what of my winter makeup looks. I call it the snowflake look, because I don't use any bronzer for it, so my skin is almmost white. It's really simple and can be done in under 10 minutes. Let's get right into it!
0. Wash your face and pat it dry with a towel.
1. Moisturize your skin. This is especially important in winter, just apply a light moistruizing cream of your choice to avoid dryness during the dye. I use Nivea Soft. Let it absorb before you continue.
2. Apply some concealer on under-eye circles and blemishes and if needed add some foundation or BB cream. I normally just use the Garnier BB Cream Miracle Skin Perfector in the shade light.
3. Add Powder. I can only recommend the Transparent Matte Loose Powder (011) by the polish brand Vipera.
4. Apply blush in a cool, pink-ish color to the apples of your cheeks. Make sure that you don't apply to much and keep it natural. My favourite right now is the Artedeco Blusher 30.
5. For the eyes, first apply some neutral eyeshadow in beige, champagne or light pink or peach to your whole lid, it should not be to shiny though. I use the lightest color in the 01 Peach Lake palette from Kiko.
6. Add just a little bit of the blush you used in step 4 to your crease, optional you can use some light pink or beige (a little bit darker than the first one).
7. Line your upper and lower water line with black or grey eye pencil, but don't make it to harsh. You only want to define your eye a bit. I use eithe Lancome Crayon Kohl Noir or Clarins Crayon Kohl 04 platinum.
8. Line your upper lash line with a gel or liquid eyeliner. I like to use the Professional Eye Liner pen from p2.
9. Put mascara on your upper and lower lashes. My favourite right now is the Maybelline the Colossal Volum' Express Cat Eyes.
10. Fill in your eyebrows with a eyebrow pencil on some matte eyeshadow matching your hair/brow color. For me, it's the Benefit Instant Brow Pencil in light to medium.
11. Last, but not least, use some lipgloss or tinted lipbalm. The color should be rather cool, and again, pink-ish, so it matches your blush. I used the Clinique Chubby Stick in Mighty Mimosa (13).
And this is the finished look - pretty simple, don't you think? If you recreate it (as if ;p) make sure to share it with me via Instagram (@heyitsOla) or Twitter (@xloley).
Subscribe to:
Posts (Atom)